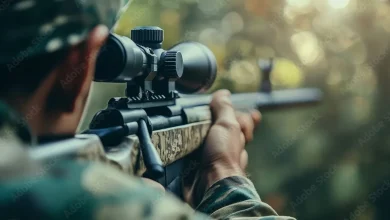
The deer dropped at the edge of the tree line, and suddenly everything you practiced in your head all those YouTube videos, that one chapter in the hunting manual your uncle gave you it all just kind of dissolves. Your hands are cold. The light is fading. And there’s a 180-pound animal in front of you that isn’t going to wait.
That’s the moment field dressing either clicks or falls apart.
I’ve been hunting for going on fifteen years now, and I’ll be straight with you: the first time I field dressed a deer by myself, I made a mess of it. I nicked the gut, the smell hit me like a wall, and I spent the next hour trying to salvage what I could. My buddy Jake we were hunting outside of Marquette, Michigan, late November he didn’t say much. Just handed me a rag and said, “Now you know.” And honestly? That’s the best education I ever got.
What Field Dressing Actually Is (And Why It Can’t Wait)
Field dressing is the process of removing the internal organs from a harvested animal usually deer, elk, or wild boar as quickly as possible after the kill. The goal is simple: cool the meat down fast and prevent spoilage. But knowing what it is and knowing how to do it without ruining twenty pounds of venison are two very different things.
Here’s the part most beginners don’t hear: heat is your enemy from the second that animal hits the ground. Every minute you spend admiring the shot, texting your group chat, or just standing there processing the moment is a minute bacteria are multiplying inside that carcass. You’ve got a window and in warm weather, that window is shorter than you think.
But rushing blindly isn’t the answer either. Panic leads to sloppy cuts. Sloppy cuts lead to punctured organs. Punctured organs lead to contaminated meat. So you need to be fast and deliberate at the same time, which is genuinely hard the first few times.
The Tools That Actually Matter
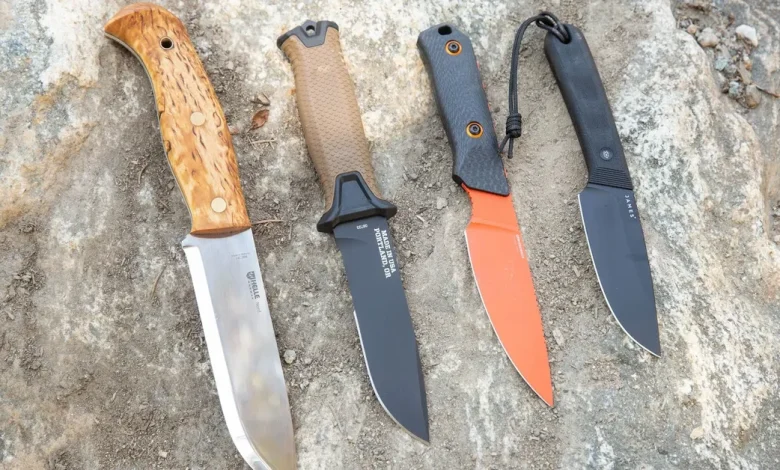
Before you touch the animal, get your gear sorted. You need a sharp fixed-blade knife not your multi-tool, not a folding pocket knife you’ve been using to cut rope all season. A dull blade is probably the single biggest mistake I see new hunters make, and I include my past self in that group. Sharp cuts clean. Dull knives drag and slip.
A few other things worth having: latex or nitrile gloves (two pairs, because things happen), a small bone saw if you’re going after elk or larger animals, and a headlamp if there’s any chance you’ll be working in low light. Oh, and rope at least ten feet of it to hang or prop the animal if you need to.
The Field Dressing Process, Step by Step
Positioning the Animal
Get the deer on its back. If you’re on a slope, position the head uphill. You want gravity working with you, not against you. Some hunters use sticks or rocks to prop the animal open whatever keeps it stable while you work.
Making the First Cut
Start just below the breastbone and cut toward the pelvis. The key here is to keep the blade angled up blade edge facing outward, away from the organs. You’re cutting through skin and muscle, not digging in. Use two fingers to guide the blade and lift the abdominal wall away from the intestines as you go. This is where most people slip up. Literally. Slow down here.
Working Through the Cavity
Once you’ve opened the abdominal cavity, you’ll need to sever the diaphragm to access the heart and lungs which, by the way, are worth saving. Reach up into the chest cavity and cut the windpipe as high as you can reach. Then it’s mostly a matter of working everything loose and rolling it out. The intestines, stomach, bladder all of it needs to come out clean. If you puncture the bladder, rinse the cavity immediately with water if you have it.
The smell is going to be intense. That’s just reality. You get used to it.
The Controversial Take Nobody Wants to Say Out Loud
Here’s something that’ll probably get me some pushback: a lot of hunters over-complicate field dressing because they’ve been taught to treat every step like surgery. And while precision matters, there’s a point where obsessing over a “perfect” job makes you slower and more likely to make actual mistakes. Done is better than perfect when the temperature is 55 degrees and climbing.
I’ve seen hunters spend forty-five minutes on a field dress that should take fifteen because they were terrified of doing something wrong. Meanwhile, the meat quality was suffering the whole time. Get it open, get it out, get it cool. That’s the hierarchy.
Cooling and Transporting the Meat
Once the cavity is empty, prop it open a stick works fine to let air circulate. If you’re in warm weather, pack the cavity with ice as soon as you can. Get the animal out of the field and into a cooler or walk-in as fast as your situation allows.
And here’s where I’ll admit I got it wrong once: I thought leaving a deer hang overnight in October in Wisconsin was fine. It was 48 degrees when I went to bed. By morning it had warmed to 62. Lost most of the hindquarters to spoilage. An expensive lesson one I’m passing along for free.
A properly field dressed deer can hang in cool conditions (below 40°F) for several days. But “cool enough” is a judgment call that depends on your specific conditions, not a rule you can copy from someone else’s setup.
What Separates Good Field Dressing from Great
Speed, cleanliness, and confidence. Those three things. And confidence only comes from doing it not from reading about it, not from watching videos, not even from this article.
Is there a shortcut to that confidence? Not really. Every hunter I respect has a story about a field dress that went sideways. It’s practically a rite of passage. What separates the hunters who get better from the ones who stay mediocre is whether they paid attention when things went wrong.
The knife goes in, the work begins, and you figure out pretty fast what you actually know versus what you just thought you knew.
That gap right there is where the real learning happens.