There’s a particular kind of frustration that every angler knows the kind that happens not on the water, but in the garage. Rods leaning against the wall at odd angles, tangled with each other, guides catching on guides, tips bending under their own weight against the concrete floor. You spend good money on decent gear, then let it deteriorate in a corner because storing it properly seems like a project you’ll get to eventually. Eventually never comes. Then one morning you find a cracked tip or a bent guide and the whole thing stings a little more than it should.
The thing is, a rod rack isn’t a luxury. It’s basic maintenance logic. And building one yourself for under twenty dollars is genuinely one of those weekend projects that takes less time than the drive to the sporting goods store.
Why Store-Bought Racks Miss the Point
Walk into any tackle shop or scroll through fishing gear sites and you’ll find rod racks ranging from fifteen dollars to well over a hundred. The cheap ones are flimsy, designed for maybe four rods, and often made from thin plastic that warps in temperature changes. The expensive ones are beautiful solid wood, felt-lined slots, wall-mounted with real hardware but they’re priced for people who want a showpiece, not a functional tool.
What most anglers actually need is something in between: sturdy, holds eight to twelve rods, protects the guides, keeps everything organized, and doesn’t take up floor space unnecessarily. That’s not a complicated engineering challenge. It’s a few pieces of wood, some foam pipe insulation, and an afternoon.
What You’ll Actually Need
The material list is short enough that you can pick everything up in a single hardware store run, and most of it you may already have sitting in a shed or garage.
One or two pieces of 1×4 pine board, typically sold in 8-foot lengths. You’ll use this for the main frame. Pine is light, easy to cut, and holds screws well no need for hardwood here. A 6-foot piece of PVC pipe, 1.5-inch diameter, works as an excellent rod-tip holder when cut into short sections. A length of foam pipe insulation the kind meant for copper plumbing is what you’ll line the lower slots with to protect rod handles and prevent scratching. You’ll also want a handful of wood screws, sandpaper in a medium grit, and wall anchors if you’re mounting into drywall.
Total cost varies slightly by region, but the rough breakdown lands around seven to nine dollars for the pine, three to four dollars for the pipe insulation, two to three dollars for PVC sections if you go that route, and whatever you spend on screws if you don’t already have them. Staying under twenty dollars is very realistic. Staying under fifteen is possible if you’re resourceful.
The Build: Simple Enough to Do in an Afternoon
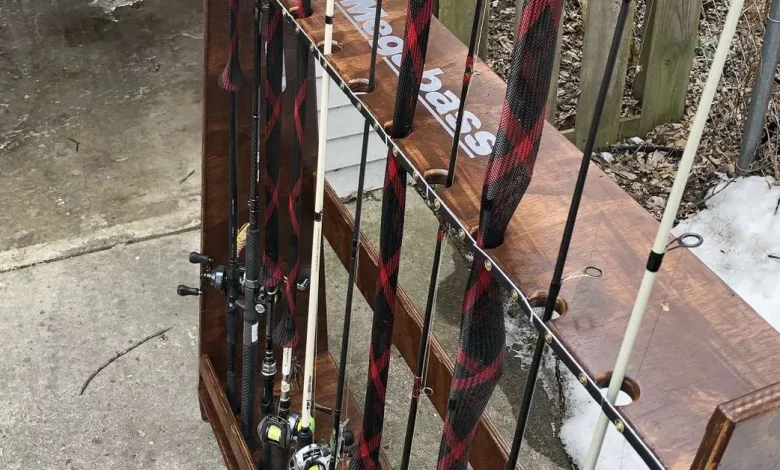
The most common DIY rod rack design is a two-board wall mount one board positioned higher on the wall to cradle the rod tips, one board lower to hold the handles. The distance between them depends on your average rod length, but 48 to 54 inches apart covers most spinning and casting rods without issue.
Cut your pine board into two pieces, each around 24 to 30 inches wide. This gives you enough horizontal space for eight to ten rods spaced comfortably. Sand the edges lightly. You don’t need it furniture-smooth, just free of splinters.
For the lower board, cut notches or drill holes spaced about two to two-and-a-half inches apart. These will hold the rod handles. Line each notch with a strip of foam pipe insulation, sliced lengthwise and pressed into place. The foam grips the rods gently and prevents the cork or EVA foam handles from getting scuffed. This detail matters more than it might seem cork handles are surprisingly delicate, and any repeated abrasion shows up over time.
For the upper board, you have two good options. You can cut similar notches and line them with foam, or you can mount short sections of PVC pipe horizontally through the board. The PVC tube approach is slightly more work but does a better job of capturing rod tips without letting them shift around. Cut your PVC into sections roughly two inches long, drill holes in the upper board slightly smaller than the pipe’s outer diameter, and press the sections in. They should hold without glue. The rod tip slides into the tube and sits there without any lateral movement.
Mount the lower board first, using wall anchors if you’re not hitting studs. Level matters here a tilted board means your rods hang at an angle and the whole rack looks sloppy. Once the lower board is secure, hold a rod against the wall to confirm the right height for the upper board before committing to that mount. This is a five-second check that saves you from filling unnecessary holes.
Variations Worth Considering
The two-board wall mount is the baseline, but once you understand the logic of it, you can adapt freely.
A freestanding version uses two identical frames connected by vertical legs essentially a ladder structure that stands on its own. This works well if you rent, move frequently, or just don’t want to put holes in a wall. The tradeoff is floor space, but if you’re storing rods in a corner anyway, a freestanding rack is a cleaner version of the same idea.
Some people prefer a ceiling-mounted horizontal rack, particularly in garages with lower ceilings where wall space is at a premium. Long rods hang horizontally from two ceiling-mounted boards, which keeps them completely out of the way. The mechanics are identical to the wall version just rotated ninety degrees and flipped overhead.
If you fish with multiple rod types ultralight spinning, heavy casting, fly rods it’s worth building separate sections within the same rack rather than mixing everything together. Fly rods in particular benefit from their own dedicated space; the delicate tips and thin blanks don’t respond well to being jostled by heavier gear.
The Small Details That Actually Protect Your Gear
A rod rack that physically holds your rods is the minimum. A rod rack that protects them is the actual goal.
Beyond foam lining, think about where you’re mounting this. Garages with wide temperature swings extremely hot in summer, near-freezing in winter are harder on rod blanks than most people realize. Graphite and fiberglass both handle temperature changes reasonably well, but repeated thermal cycling combined with humidity fluctuations can affect epoxy coatings on guides over time. If your garage gets extreme, consider mounting the rack on an interior wall, or in a basement or utility room where conditions are more stable.
Also, never store a rod in a rack while it’s still wet. It seems obvious, but after a long day on the water, the habit of just racking everything and walking away is tempting. Moisture trapped between rod and foam accelerates corrosion on guide rings and can leave water stains on cork. Two minutes of wiping down before racking makes a real difference across a season.
What This Project Is Actually About
There’s something almost philosophical about building your own gear storage. You spend real time and money acquiring fishing equipment, then often treat the storage of that equipment as an afterthought a problem to solve later, with whatever space happens to be left over.
Building a rod rack, even a simple one, reorients that logic. It says the gear matters enough to be kept properly. It means you walk into your garage and immediately know what you have, what’s ready, what needs attention. There’s a certain satisfaction in seeing eight rods hanging cleanly in a row, guides aligned, handles protected, nothing leaning against anything else.
Twenty dollars and a few hours is a small investment. What it returns in gear longevity, in reduced frustration, in the quiet pleasure of a well-organized space is disproportionately larger than the cost suggests.