Don’t Toss Those Boots Yet! The Ultimate Guide to Gear Repair and Maintenance
Don’t Toss Those Boots Yet! The Ultimate Guide to Gear Repair and Maintenance
The Hidden Cost of Throwing Things Away
There’s a particular kind of grief that comes with tossing out a well-worn pair of boots. Not dramatic grief more like a quiet, nagging feeling that you’re giving up on something that still had a little fight left in it. Most of us have been there: a sole starts peeling, a zipper snags, a seam splits along the toe box, and suddenly a boot that carried you through three winters and a dozen camping trips gets shoved into a trash bag. It feels wrong, and honestly, it usually is.
The outdoor gear industry has done a masterful job convincing consumers that newer is always better. New materials, new waterproofing technology, new lacing systems the marketing cycle never stops. But here’s what the glossy catalogs won’t tell you: the vast majority of gear failures are fixable, often with tools you already own or products that cost less than a cup of coffee. Knowing how to repair and maintain your equipment doesn’t just save money. It builds a different relationship with the things you carry one based on understanding rather than consumption.
Reading the Damage Before You React
Before you reach for glue or a needle and thread, slow down. The most common repair mistake is treating the symptom without understanding the cause. A sole that keeps delaminating isn’t just a glue problem it might be telling you that moisture has been getting trapped inside the boot, or that the midsole foam has compressed to the point where it’s flexing in ways the original bonding wasn’t designed to handle.
Run your fingers along the seams. Press on the midsole. Flex the boot and watch where the upper creases. Peel back any loose material gently to see what’s underneath. This diagnostic step takes maybe five minutes, but it determines whether your repair will last a season or fall apart on your first wet trail. Gear repair rewards patience. It punishes impatience almost every time.
Sole Separation: The Most Common Boot Ailment
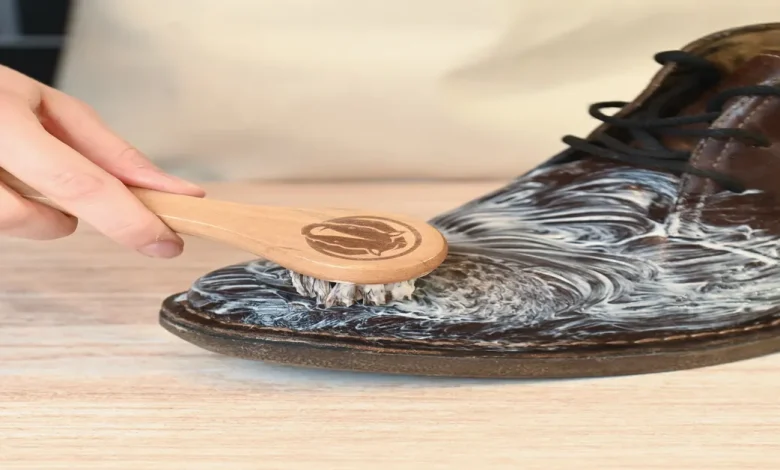
Sole separation is probably the most widespread boot problem, and it’s also one of the most mishandled. People grab whatever contact cement or super glue is in the garage, slap it on, clamp the boot overnight, and call it done. Two weeks later, the sole is peeling again usually worse than before, because now there’s old adhesive contaminating the bond surface.
The right approach starts with cleaning. Use rubbing alcohol or acetone to thoroughly degrease both the sole and the upper where they meet. Let it dry completely. If there’s old adhesive residue, scrape it off carefully with a dull blade or sandpaper. Then apply a purpose-made boot adhesive Barge All-Purpose Cement and Gear Aid’s Freesole are both workhorses that outdoor repair enthusiasts swear by. Apply a thin, even coat to both surfaces, let it get tacky (usually five to ten minutes), then press the surfaces together firmly. Clamp or use heavy books, and leave it for at least 24 hours before putting any stress on it.
The difference between a repair that lasts and one that doesn’t is almost always in the prep work. The adhesive itself is almost secondary.
Waterproofing: What Actually Works and What’s Just Marketing
Waterproof-breathable membranes like Gore-Tex don’t actually lose their waterproofing the membrane itself stays intact for years. What fails is the DWR, or durable water repellent, coating on the outer fabric. When that coating degrades, the outer layer starts to absorb water instead of shedding it. The boot feels wet and heavy even though technically no water is getting through to your sock. This phenomenon has a name in the industry: wetting out.
Restoring DWR is straightforward. Clean the boot thoroughly with a mild soap Nikwax Footwear Cleaning Gel is a good choice and let it dry. Then apply a DWR treatment like Nikwax TX.Direct or Grangers Performance Repel. Here’s the part most people skip: heat activation. A warm dryer cycle or careful use of a heat gun helps the treatment bond to the fabric fibers. Without heat, you’re getting maybe 30 percent of the performance you should be.
Do this once a season if you’re a regular user, or any time you notice water beading less aggressively on the upper. It takes twenty minutes and extends the functional life of waterproof boots by years.
Laces, Eyelets, and the Small Things That Ruin Big Days
Nobody thinks about laces until one snaps at the trailhead. Eyelets get bent, corrode, or pull away from the upper, and most people accept this as inevitable wear. It isn’t. Replacement laces are cheap and swapping them out before they fail is one of the easiest maintenance habits to build. Keep a spare pair in your pack. It’s not dramatic advice, but it’s saved more than a few trips.
Bent metal eyelets can often be reshaped with needle-nose pliers. If an eyelet has pulled through the leather or fabric, a cobbler can install a replacement this is a ten-minute job for someone with the right punch and dies, and it usually costs almost nothing. Speed hooks that have lost their tension can sometimes be bent back into shape; if they’re cracked, they need to be replaced before they cut through your lace mid-hike.
Leather boots have their own maintenance rhythm. Conditioning the leather every few months with a product like Obenauf’s Heavy Duty LP or Sno-Seal keeps the material supple and prevents the micro-cracking that eventually leads to seam failure. Dry leather cracks. Cracked leather lets water in. Water weakens seams. Seams fail. The whole chain of events is preventable with a jar of conditioner and fifteen minutes of attention.
When to Bring in a Professional
There’s a certain DIY pride that can push people past the point where home repair makes sense. A full resoling where the entire outsole and sometimes the midsole are replaced is genuinely beyond most home setups. It requires lasting equipment, specialized adhesives applied under pressure, and experience with how different sole materials behave. A good cobbler or a boot repair service like Dave Page Cobbler in Seattle or the repair programs offered by brands like Danner and Red Wing can resole a quality boot for a fraction of the replacement cost.
The calculus is simple: if the upper is in good shape and the boot fits you well, resoling almost always makes economic and environmental sense. A quality leather boot that fits perfectly is genuinely hard to replace. The break-in period alone for a new pair can be measured in blisters.
Zipper replacement is another job worth outsourcing. Zippers on gaiters, boot liners, and ski boots take enormous stress, and a poorly installed replacement will fail faster than the original. YKK zippers are the industry standard for a reason if someone is quoting you a repair using an off-brand zipper, push back or find someone else.
Building the Habit Before Things Break
The best repair is the one you never have to make. After every significant outing, knock the mud off your boots before it dries and hardens in the seams. Let them dry at room temperature not next to a heat source, which dries out leather and degrades foam. Remove the insoles and let them air out separately. Check the laces. Run a thumb along the welt.
This takes maybe three minutes. Over a season, those three-minute check-ins catch the small problems before they become expensive ones. A loose stitch caught early is a five-minute hand-sewing job. That same loose stitch ignored for two months becomes a seam failure that lets water in, which softens the rand, which accelerates sole delamination. Small problems have a way of recruiting each other.
The gear that lasts isn’t always the most expensive gear. It’s the gear that gets looked after cleaned, conditioned, repaired thoughtfully, and treated as something worth keeping. There’s a reason your grandfather’s work boots are still sitting in the garage, still wearable, while the cheap pair you bought three years ago fell apart in eighteen months. Material quality matters, but it’s only half the equation.
The other half is attention. And attention, fortunately, costs nothing at all.